英語の発音をもう一度ひとつひとつわかりやすく。
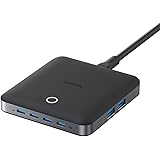
¥1,760 (2025-06-30 08:12 GMT +09:00 時点 - 詳細はこちら価格および発送可能時期は表示された日付/時刻の時点のものであり、変更される場合があります。本商品の購入においては、購入の時点で当該の Amazon サイトに表示されている価格および発送可能時期の情報が適用されます。)Anker Nano Charger (130W, 6 Ports) ブラック
¥7,990 (2025-06-30 08:12 GMT +09:00 時点 - 詳細はこちら価格および発送可能時期は表示された日付/時刻の時点のものであり、変更される場合があります。本商品の購入においては、購入の時点で当該の Amazon サイトに表示されている価格および発送可能時期の情報が適用されます。)プロジェクト・ヘイル・メアリー 上
¥1,155 (2025-06-30 08:12 GMT +09:00 時点 - 詳細はこちら価格および発送可能時期は表示された日付/時刻の時点のものであり、変更される場合があります。本商品の購入においては、購入の時点で当該の Amazon サイトに表示されている価格および発送可能時期の情報が適用されます。)現代開発者のためのコンテナ化環境構築:Docker・DevContainer完全活用ガイド
開発環境の構築で「動かない」「環境が違う」といった問題に悩まされた経験はありませんか?チーム開発では、メンバー間の環境差異によるバグや、新人の環境構築に数日かかるといった課題が日常茶飯事です。
コンテナ化開発環境は、これらの問題を根本的に解決します。この記事では、Docker と VS Code DevContainer を活用した現代的な開発環境の構築方法を、実践的なサンプルとともに詳しく解説します。
なぜコンテナ化開発環境が必要なのか
従来の環境構築の限界
個人開発での問題点:
- OSやバージョンの違いによる動作差異
- 複数プロジェクトでの依存関係の競合
- 環境設定の複雑化と保守困難
チーム開発での深刻な課題:
- 新メンバーの環境構築に1週間以上
- 「私の環境では動く」問題の頻発
- 本番環境との差異によるデプロイ時のバグ
- 環境設定ドキュメントの保守負荷
コンテナ化が解決する5つの課題
1. 環境の完全な再現性
- Dockerfileによる環境定義の明文化
- 誰がいつ実行しても同じ環境を構築
2. チーム間の環境統一
- 全メンバーが同一のコンテナイメージを使用
- OS や個人設定に依存しない開発環境
3. 本番環境との一貫性
- 開発・ステージング・本番で同じイメージを使用
- 環境差異によるバグの根絶
4. 新人のオンボーディング高速化
- git clone → docker compose up で即座に開発開始
- 環境構築説明が不要
5. プロジェクト間の完全分離
- コンテナによる完全な環境分離
- 依存関係の競合問題を解消
開発チームでの導入効果
実際の導入事例での効果測定結果:
時間効率の改善:
- 新人研修期間:1週間 → 1日
- 環境トラブル解決時間:半日 → 10分
- 新機能開発開始まで:2-3日 → 30分
品質向上の効果:
- 環境差異によるバグ:月10件 → 0件
- デプロイ失敗率:20% → 5%以下
- コードレビュー効率:2倍向上
Docker基礎と開発環境設計
この章では、開発用途に特化したDockerの実装を学びます:
実装する環境コンポーネント:
- マルチステージビルドによるDockerfile設計
- Docker Composeによる複数サービス連携
- 開発効率を重視した設定最適化
- セキュリティとパフォーマンスのバランス
期待する成果:
- 本格的なプロダクションレベルの設定
- チーム開発に即座に適用可能な構成
- 拡張性と保守性を考慮した設計
Docker Engine セットアップ(業務利用対応)
Docker Desktop ライセンス制限について
Docker Desktopは大企業での業務利用に有償ライセンスが必要です。そのため、業務環境では以下の無償代替手段を使用することを推奨します:
各OS対応のDocker Engine インストール手順:
Windows:
Windowsでは、WSL2内にDocker Engineを直接インストールして使用します。Docker Desktopを使わずに完全な開発環境を構築できます:
# PowerShellで実行(管理者権限)
# WSL2の有効化
dism.exe /online /enable-feature /featurename:Microsoft-Windows-Subsystem-Linux /all /norestart
dism.exe /online /enable-feature /featurename:VirtualMachinePlatform /all /norestart

# Ubuntu 22.04 LTSをインストール
wsl --install -d Ubuntu-22.04

# WSL内でDocker Engineをインストール(次のLinux手順を参照)
macOS:
macOSでは、OrbStackやColima、Podmanなどの軽量な代替手段を使用できます。最も推奨されるOrbStackの手順:
# OrbStack(推奨)- 軽量で高性能
brew install orbstack

# または Colima(無償・オープンソース)
brew install colima docker docker-compose
colima start

# または Podman(Red Hat製・完全無償)
brew install podman podman-compose
podman machine init
podman machine start
Linux (Ubuntu/Debian):
Linuxでは、Docker公式リポジトリから最新のDocker Engineを直接インストールします。これが最も確実で高性能な方法です:
# 既存パッケージの削除(クリーンインストール)
sudo apt remove docker docker-engine docker.io containerd runc

# 必要なパッケージのインストール
sudo apt update
sudo apt install ca-certificates curl gnupg lsb-release

# Docker公式GPGキーの追加
sudo mkdir -p /etc/apt/keyrings
curl -fsSL https://download.docker.com/linux/ubuntu/gpg | sudo gpg --dearmor -o /etc/apt/keyrings/docker.gpg

# Dockerリポジトリの追加
echo "deb [arch=$(dpkg --print-architecture) signed-by=/etc/apt/keyrings/docker.gpg] https://download.docker.com/linux/ubuntu $(lsb_release -cs) stable" | sudo tee /etc/apt/sources.list.d/docker.list > /dev/null

# Docker Engineのインストール
sudo apt update
sudo apt install docker-ce docker-ce-cli containerd.io docker-buildx-plugin docker-compose-plugin

# ユーザーをdockerグループに追加(sudo不要で実行可能)
sudo usermod -aG docker $USER
newgrp docker  # またはログアウト・ログイン

# systemdでの自動起動設定
sudo systemctl enable docker
sudo systemctl start docker
CentOS/RHEL/Fedora:
# 既存パッケージの削除
sudo dnf remove docker docker-client docker-client-latest docker-common docker-latest docker-latest-logrotate docker-logrotate docker-engine podman runc

# Dockerリポジトリの追加
sudo dnf config-manager --add-repo https://download.docker.com/linux/fedora/docker-ce.repo

# Docker Engineのインストール
sudo dnf install docker-ce docker-ce-cli containerd.io docker-buildx-plugin docker-compose-plugin

# 自動起動とユーザー設定
sudo systemctl enable --now docker
sudo usermod -aG docker $USER
newgrp docker
インストール確認:
Docker環境が正しくセットアップされているかを確認します。以下のコマンドでバージョン情報とテスト実行を行います:
# Dockerの動作確認
docker --version
docker compose version  # 新しいプラグイン形式

# テストコンテナの実行
docker run hello-world

# Docker Composeの動作確認
docker compose --help
開発用Dockerfileの設計パターン
マルチステージビルドの実装
開発効率と本番品質を両立するDockerfile設計:
マルチステージビルドを使用することで、開発用と本番用の環境を一つのDockerfileで管理できます。以下は、Python開発環境向けの実践的なDockerfile例です:
Poetryを導入して依存関係管理を管理していますが、pip + requirements.txtでも構いません。以下の例では、Poetryを使用したマルチステージビルドを実装しています:
# Dockerfile - Python開発環境用マルチステージビルド
FROM python:3.11-slim as base

# システムレベルの依存関係をインストール
# 開発・本番共通の基盤を構築
RUN apt-get update && apt-get install -y
    # ビルドツール
    build-essential
    curl
    git
    # データベース接続ライブラリ
    libpq-dev
    # SSL証明書
    ca-certificates
    && rm -rf /var/lib/apt/lists/*
    && apt-get clean

# Poetryのインストール(パッケージ管理)
ENV POETRY_HOME="/opt/poetry"
ENV POETRY_PATH="$POETRY_HOME/bin"
ENV PATH="$POETRY_PATH:$PATH"
RUN curl -sSL https://install.python-poetry.org | python3 -
RUN poetry config virtualenvs.create false

# 作業ディレクトリの設定
WORKDIR /app

# 依存関係ファイルを先にコピー(Docker キャッシュ効率化)
COPY pyproject.toml poetry.lock* ./

#==============================================================================
# 開発環境用ステージ
#==============================================================================
FROM base as development

# 開発用パッケージの追加
RUN apt-get update && apt-get install -y
    # 開発ツール
    vim
    tmux
    htop
    tree
    # デバッグツール
    gdb
    strace
    # ネットワークツール
    iputils-ping
    telnet
    && rm -rf /var/lib/apt/lists/*

# 開発用依存関係のインストール
RUN poetry install --with dev

# Jupyter Lab設定(データ分析用)
RUN jupyter lab --generate-config
COPY .jupyter/jupyter_lab_config.py /root/.jupyter/ 2>/dev/null || true

# Git設定のセットアップ
RUN git config --global init.defaultBranch main

# 開発用環境変数
ENV PYTHONPATH=/app
ENV PYTHONDONTWRITEBYTECODE=1
ENV PYTHONUNBUFFERED=1
ENV ENVIRONMENT=development

# 開発サーバーポートの公開
EXPOSE 8000 8888

# 開発用エントリーポイント
COPY scripts/entrypoint.dev.sh /entrypoint.sh
RUN chmod +x /entrypoint.sh

ENTRYPOINT ["/entrypoint.sh"]
CMD ["bash"]

#==============================================================================
# 本番環境用ステージ
#==============================================================================
FROM base as production

# 本番用依存関係のみインストール
RUN poetry install --only main --no-dev

# アプリケーションコードのコピー
COPY src/ /app/src/
COPY scripts/entrypoint.prod.sh /entrypoint.sh
RUN chmod +x /entrypoint.sh

# 本番用環境変数
ENV PYTHONPATH=/app
ENV PYTHONDONTWRITEBYTECODE=1
ENV PYTHONUNBUFFERED=1
ENV ENVIRONMENT=production

# セキュリティ: 非rootユーザーで実行
RUN adduser --disabled-password --gecos '' appuser
RUN chown -R appuser:appuser /app
USER appuser

EXPOSE 8000

ENTRYPOINT ["/entrypoint.sh"]
CMD ["python", "-m", "uvicorn", "src.main:app", "--host", "0.0.0.0", "--port", "8000"]
エントリーポイントスクリプト(開発用):
開発環境初期化用のエントリーポイントスクリプトです。コンテナ起動時に必要な初期化処理を自動実行します:
#!/bin/bash
# scripts/entrypoint.dev.sh - 開発環境初期化スクリプト

set -e

echo "🚀 開発環境を初期化中..."

# 依存関係の最新化チェック
if [ -f "poetry.lock" ]; then
    echo "📦 依存関係を確認中..."
    poetry install --with dev
fi

# データベース接続の待機
if [ -n "$DATABASE_URL" ]; then
    echo "🗄️  データベース接続を待機中..."
    python -c "
import time
import psycopg2
from urllib.parse import urlparse
import os

url = urlparse(os.environ['DATABASE_URL'])
for i in range(30):
    try:
        conn = psycopg2.connect(
            host=url.hostname,
            port=url.port,
            user=url.username,
            password=url.password,
            database=url.path[1:]
        )
        conn.close()
        print('✅ データベース接続成功')
        break
    except:
        print(f'⏳ データベース接続待機中... ({i+1}/30)')
        time.sleep(2)
else:
    print('❌ データベース接続タイムアウト')
"
fi

# マイグレーションの実行(必要に応じて)
if [ -f "alembic.ini" ]; then
    echo "🔄 データベースマイグレーション実行中..."
    alembic upgrade head || echo "⚠️  マイグレーション失敗(初回は正常)"
fi

# 開発サーバーの起動準備
echo "✅ 開発環境初期化完了"

# コマンドが指定されていない場合はbashを起動
exec "$@"
Docker Compose による複数サービス連携
完全なdocker-compose.yml設定
実際のプロジェクトで使用できる本格的な構成:
以下はWebアプリケーション、データベース、キャッシュ、フロントエンドを統合した完全な開発環境の設定例です。この構成で、チーム全体で一貫した開発環境を実現できます:
# docker-compose.yml - 開発環境全体のオーケストレーション
# Docker Compose V2 プラグイン形式に対応

# 共通環境変数の定義
x-common-env: &common-env
  # データベース接続
  DATABASE_URL: postgresql://devuser:devpass@postgres:5432/devdb
  # キャッシュ接続
  REDIS_URL: redis://redis:6379/0
  # アプリケーション設定
  SECRET_KEY: dev-secret-key-change-in-production
  DEBUG: "true"
  ENVIRONMENT: development

services:
  #============================================================================
  # メインアプリケーション
  #============================================================================
  app:
    build:
      context: .
      dockerfile: Dockerfile
      target: development
    container_name: ${PROJECT_NAME:-myapp}-app
    volumes:
      # ソースコードのマウント(ホットリロード対応)
      - .:/app
      # Poetry キャッシュの永続化
      - poetry-cache:/root/.cache/pypoetry
      # Jupyter データの永続化
      - jupyter-data:/root/.jupyter
    environment:
      <<: *common-env
    ports:
      - "${APP_PORT:-8000}:8000"
      - "${JUPYTER_PORT:-8888}:8888"
    depends_on:
      postgres:
        condition: service_healthy
      redis:
        condition: service_started
    networks:
      - dev-network
    # 開発時のデバッグ情報表示
    labels:
      - "traefik.enable=true"
      - "traefik.http.routers.app.rule=Host(`localhost`)"

  #============================================================================
  # PostgreSQL データベース
  #============================================================================
  postgres:
    image: postgres:15-alpine
    container_name: ${PROJECT_NAME:-myapp}-postgres
    environment:
      # データベース初期設定
      POSTGRES_DB: devdb
      POSTGRES_USER: devuser
      POSTGRES_PASSWORD: devpass
      POSTGRES_INITDB_ARGS: "--encoding=UTF-8 --locale=C"
      # パフォーマンス設定(開発用)
      POSTGRES_SHARED_BUFFERS: 256MB
      POSTGRES_MAX_CONNECTIONS: 100
    volumes:
      # データの永続化
      - postgres-data:/var/lib/postgresql/data
      # 初期化SQLスクリプト
      - ./scripts/init-db.sql:/docker-entrypoint-initdb.d/01-init.sql
      - ./scripts/sample-data.sql:/docker-entrypoint-initdb.d/02-sample-data.sql
    ports:
      - "${POSTGRES_PORT:-5432}:5432"
    # ヘルスチェック設定
    healthcheck:
      test: ["CMD-SHELL", "pg_isready -U devuser -d devdb"]
      interval: 10s
      timeout: 5s
      retries: 5
      start_period: 30s
    networks:
      - dev-network

  #============================================================================
  # Redis キャッシュ・セッションストア
  #============================================================================
  redis:
    image: redis:7-alpine
    container_name: ${PROJECT_NAME:-myapp}-redis
    command: redis-server --appendonly yes --maxmemory 256mb --maxmemory-policy allkeys-lru
    volumes:
      - redis-data:/data
    ports:
      - "${REDIS_PORT:-6379}:6379"
    networks:
      - dev-network

  #============================================================================
  # Jupyter Lab(データ分析用)
  #============================================================================
  jupyter:
    build:
      context: .
      dockerfile: Dockerfile
      target: development
    container_name: ${PROJECT_NAME:-myapp}-jupyter
    command: >
      bash -c "
        jupyter lab --ip=0.0.0.0 --port=8888 --allow-root --no-browser
        --NotebookApp.token='' --NotebookApp.password=''
        --NotebookApp.allow_origin='*'
      "
    volumes:
      - .:/app
      - jupyter-data:/root/.jupyter
      - ./notebooks:/app/notebooks
    environment:
      <<: *common-env
      JUPYTER_ENABLE_LAB: "yes"
    ports:
      - "${JUPYTER_LAB_PORT:-8889}:8888"
    depends_on:
      postgres:
        condition: service_healthy
      redis:
        condition: service_started
    networks:
      - dev-network

  #============================================================================
  # pgAdmin(データベース管理ツール)
  #============================================================================
  pgadmin:
    image: dpage/pgadmin4:latest
    container_name: ${PROJECT_NAME:-myapp}-pgadmin
    environment:
      PGADMIN_DEFAULT_EMAIL: admin@example.com
      PGADMIN_DEFAULT_PASSWORD: admin
      PGADMIN_CONFIG_SERVER_MODE: "False"
    volumes:
      - pgadmin-data:/var/lib/pgadmin
    ports:
      - "${PGADMIN_PORT:-5050}:80"
    depends_on:
      postgres:
        condition: service_healthy
    networks:
      - dev-network
    profiles:
      - tools  # docker-compose --profile tools up で起動

  #============================================================================
  # Mailhog(メール送信テスト用)
  #============================================================================
  mailhog:
    image: mailhog/mailhog:latest
    container_name: ${PROJECT_NAME:-myapp}-mailhog
    ports:
      - "${MAILHOG_WEB_PORT:-8025}:8025"  # Web UI
      - "${MAILHOG_SMTP_PORT:-1025}:1025"  # SMTP
    networks:
      - dev-network
    profiles:
      - tools

#==============================================================================
# ボリューム定義(データ永続化)
#==============================================================================
volumes:
  postgres-data:
    driver: local
  redis-data:
    driver: local
  jupyter-data:
    driver: local
  pgadmin-data:
    driver: local
  poetry-cache:
    driver: local

#==============================================================================
# ネットワーク定義
#==============================================================================
networks:
  dev-network:
    driver: bridge
    ipam:
      driver: default
      config:
        - subnet: 172.20.0.0/16
環境変数設定ファイル:
プロジェクトの環境設定を一元管理するための環境変数テンプレートです。このファイルを.envにコピーして、プロジェクト固有の値を設定します:
# .env.example - 環境変数テンプレート
# 実際の開発では .env にコピーして使用

#==============================================================================
# プロジェクト設定
#==============================================================================
PROJECT_NAME=myapp
ENVIRONMENT=development

#==============================================================================
# ポート設定
#==============================================================================
APP_PORT=8000
JUPYTER_PORT=8888
JUPYTER_LAB_PORT=8889
POSTGRES_PORT=5432
REDIS_PORT=6379
PGADMIN_PORT=5050
MAILHOG_WEB_PORT=8025
MAILHOG_SMTP_PORT=1025

#==============================================================================
# データベース設定
#==============================================================================
POSTGRES_DB=devdb
POSTGRES_USER=devuser
POSTGRES_PASSWORD=devpass
DATABASE_URL=postgresql://devuser:devpass@localhost:5432/devdb

#==============================================================================
# アプリケーション設定
#==============================================================================
SECRET_KEY=dev-secret-key-change-in-production
DEBUG=true
LOG_LEVEL=DEBUG

#==============================================================================
# 外部サービス設定(必要に応じて)
#==============================================================================
# AWS_ACCESS_KEY_ID=your-aws-access-key
# AWS_SECRET_ACCESS_KEY=your-aws-secret-key
# STRIPE_PUBLISHABLE_KEY=pk_test_your-stripe-key
# STRIPE_SECRET_KEY=sk_test_your-stripe-secret
VS Code DevContainer実践
この章では、VS Code DevContainer の完全設定を実装します:
実装する統合機能:
- VS Code拡張機能の自動インストール
- デバッグ環境の完全統合設定
- Git・GitHub連携の自動化
- コード品質ツールの統合
期待する開発体験:
- コンテナ内でのネイティブな開発体験
- ワンクリックでの完全な開発環境起動
- チーム間での開発環境統一
DevContainer設定ファイルの詳細
完全な.devcontainer設定
プロダクションレベルのDevContainer構成:
以下は、VS Code DevContainerの完全な設定ファイルです。この設定により、VS Codeでプロジェクトを開くだけで、自動的にコンテナ環境が構築され、必要な拡張機能や設定が適用されます:
{
"name": "Python Development Environment",
"dockerComposeFile": "../docker-compose.yml",
"service": "app",
"workspaceFolder": "/app",
"shutdownAction": "stopCompose",
// VS Code統合設定
"customizations": {
"vscode": {
"settings": {
//======================================================================
// Python開発設定
//======================================================================
"python.defaultInterpreterPath": "/usr/local/bin/python",
"python.terminal.activateEnvironment": false,
// リンティング設定
"python.linting.enabled": true,
"python.linting.pylintEnabled": true,
"python.linting.flake8Enabled": true,
"python.linting.mypyEnabled": true,
"python.linting.lintOnSave": true,
// フォーマッティング設定
"python.formatting.provider": "black",
"python.formatting.blackArgs": ["--line-length", "88"],
// テスト設定
"python.testing.pytestEnabled": true,
"python.testing.pytestArgs": [
"tests/",
"-v",
"--tb=short"
],
"python.testing.autoTestDiscoverOnSaveEnabled": true,
//======================================================================
// エディタ設定
//======================================================================
"editor.formatOnSave": true,
"editor.formatOnPaste": false,
"editor.formatOnType": false,
"editor.codeActionsOnSave": {
"source.organizeImports": true,
"source.fixAll": true,
"source.fixAll.pylint": true
},
"editor.rulers": [88, 120],
"editor.tabSize": 4,
"editor.insertSpaces": true,
"editor.trimAutoWhitespace": true,
//======================================================================
// Jupyter設定
//======================================================================
"jupyter.askForKernelRestart": false,
"jupyter.interactiveWindow.collapseCellInputCode": true,
"jupyter.sendSelectionToInteractiveWindow": true,
"jupyter.defaultKernel": "Python 3",
//======================================================================
// Git設定
//======================================================================
"git.autofetch": true,
"git.enableSmartCommit": true,
"git.confirmSync": false,
"git.enableStatusBarSync": true,
//======================================================================
// ファイル設定
//======================================================================
"files.autoSave": "afterDelay",
"files.autoSaveDelay": 1000,
"files.trimTrailingWhitespace": true,
"files.insertFinalNewline": true,
"files.exclude": {
"**/__pycache__": true,
"**/.pytest_cache": true,
"**/.coverage": true,
"**/node_modules": true
},
//======================================================================
// ターミナル設定
//======================================================================
"terminal.integrated.defaultProfile.linux": "bash",
"terminal.integrated.cwd": "/app",
"terminal.integrated.fontSize": 14,
//======================================================================
// その他の開発設定
//======================================================================
"workbench.startupEditor": "welcomePageInEmptyWorkbench",
"explorer.confirmDelete": false,
"breadcrumbs.enabled": true
},
//========================================================================
// VS Code拡張機能(自動インストール)
//========================================================================
"extensions": [
// Python開発の必須拡張機能
"ms-python.python",
"ms-python.vscode-pylance",
"ms-python.black-formatter",
"ms-python.isort",
"ms-python.pylint",
"ms-python.flake8",
"ms-python.mypy-type-checker",
// Jupyter Notebook支援
"ms-toolsai.jupyter",
"ms-toolsai.jupyter-keymap",
"ms-toolsai.jupyter-renderers",
// データ分析・可視化
"RandomFractalsInc.vscode-data-preview",
"mechatroner.rainbow-csv",
"ms-toolsai.datawrangler",
// Git & GitHub連携
"GitHub.copilot",
"GitHub.copilot-chat",
"eamodio.gitlens",
"GitHub.vscode-pull-request-github",
// コード品質・テスト
"ms-python.pytest",
"ryanluker.vscode-coverage-gutters",
"hbenl.vscode-test-explorer",
// ファイル・プロジェクト管理
"ms-vscode.vscode-json",
"redhat.vscode-yaml",
"ms-vscode-remote.remote-containers",
"ms-vscode.remote-explorer",
// Docker関連
"ms-azuretools.vscode-docker",
"ms-vscode-remote.remote-containers",
// ドキュメント作成
"yzhang.markdown-all-in-one",
"DavidAnson.vscode-markdownlint",
"bierner.markdown-mermaid",
// 開発効率向上
"oderwat.indent-rainbow",
"PKief.material-icon-theme",
"zhuangtongfa.Material-theme",
"ms-vscode.vscode-typescript-next",
"bradlc.vscode-tailwindcss"
]
}
},
//==========================================================================
// ライフサイクルコマンド
//==========================================================================
"onCreateCommand": {
"install-dependencies": "poetry install --with dev",
"setup-pre-commit": "pre-commit install",
"setup-git-hooks": "git config core.hooksPath .githooks"
},
"postCreateCommand": "bash scripts/dev-setup.sh",
"postStartCommand": "python scripts/health-check.py",
//==========================================================================
// ポート転送設定
//==========================================================================
"forwardPorts": [8000, 8888, 8889, 5432, 6379, 5050, 8025],
"portsAttributes": {
"8000": {
"label": "FastAPI Application",
"onAutoForward": "notify",
"protocol": "http"
},
"8888": {
"label": "Jupyter Lab",
"onAutoForward": "openBrowser",
"protocol": "http"
},
"8889": {
"label": "Jupyter Notebook",
"onAutoForward": "ignore"
},
"5432": {
"label": "PostgreSQL Database",
"onAutoForward": "silent"
},
"6379": {
"label": "Redis Cache",
"onAutoForward": "silent"
},
"5050": {
"label": "pgAdmin",
"onAutoForward": "ignore"
},
"8025": {
"label": "Mailhog Web UI",
"onAutoForward": "ignore"
}
},
//==========================================================================
// マウント設定
//==========================================================================
"mounts": [
// Git設定を継承
"source=${localEnv:HOME}/.gitconfig,target=/root/.gitconfig,type=bind,consistency=cached",
// SSH設定を継承(必要に応じて)
"source=${localEnv:HOME}/.ssh,target=/root/.ssh,type=bind,consistency=cached",
// AWS設定を継承(必要に応じて)
"source=${localEnv:HOME}/.aws,target=/root/.aws,type=bind,consistency=cached"
],
//==========================================================================
// 開発用機能の追加
//==========================================================================
"features": {
// Git最新版
"ghcr.io/devcontainers/features/git:1": {
"version": "latest"
},
// GitHub CLI
"ghcr.io/devcontainers/features/github-cli:1": {
"version": "latest"
},
// Docker-in-Docker(必要に応じて)
"ghcr.io/devcontainers/features/docker-in-docker:2": {
"version": "latest",
"dockerDashComposeVersion": "v2"
},
// Node.js(フロントエンド開発用)
"ghcr.io/devcontainers/features/node:1": {
"version": "18"
}
},
//==========================================================================
// コンテナ設定
//==========================================================================
"containerUser": "root",
"updateRemoteUserUID": true,
// 環境変数の設定
"containerEnv": {
"PYTHONPATH": "/app",
"ENVIRONMENT": "development",
"TERM": "xterm-256color"
},
// 実行時設定
"runArgs": [
"--init",
"--privileged"  // Docker-in-Dockerが必要な場合
]
}
まとめ
この記事では、Docker Engine と VS Code DevContainer を活用した現代的なコンテナ化開発環境の構築方法を詳しく解説しました。
この記事で学んだこと
基本環境構築:
- Docker Desktop の代替手段(業務利用対応)
- マルチステージビルドによる効率的なDockerfile設計
- Docker Compose による複数サービス連携
VS Code統合:
- DevContainer による完全な開発環境統合
- 拡張機能とカスタム設定の自動化
- ポート転送とデバッグ環境の構築
実践的な設定:
- 環境変数管理とセキュリティ考慮
- 開発効率を高めるエイリアスとスクリプト
- チーム開発での標準化手法
次のステップ
コンテナ化開発環境の基礎を理解したら、以下の分野でさらに学習を深めることをお勧めします:
- プロジェクト固有の最適化: 各言語・フレームワークに特化した設定
- CI/CD統合: GitHub Actions との連携
- 本番環境デプロイ: Kubernetes や Docker Swarm への展開
- セキュリティ強化: コンテナセキュリティのベストプラクティス
- パフォーマンス最適化: 大規模プロジェクトでの効率化
重要なポイント
- 段階的導入: 小さなプロジェクトから始めて徐々に拡張
- チーム標準化: 全メンバーで一貫した環境を維持
- 継続的改善: 新しいツールや手法の定期的な評価
- セキュリティ重視: 本番環境を意識した設定
- ドキュメント化: 設定の意図と変更履歴を記録
コンテナ化開発環境は、初期投資は必要ですが、長期的に大幅な生産性向上をもたらします。この記事の内容を参考に、自分のプロジェクトに最適な環境を構築してください。
ご質問やご意見がありましたら、お問い合わせページからお気軽にご連絡ください!
関連記事:


